Whether you’re looking to revamp your wardrobe or find an engaging weekend project, DIY tie-dye offers endless possibilities for creative expression. This fun and colorful art form turns plain fabrics into vibrant masterpieces with just a few folds and splashes of dye. Below, we delve into the essential materials you’ll need and some popular techniques to get you started on your tie-dye journey.
Gathering Your Tie-Dye Essentials
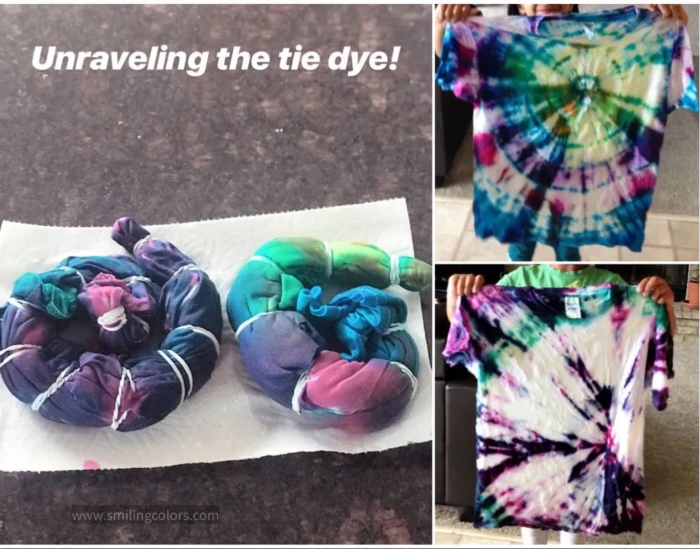
Before you dive into the dyeing process, you’ll need to prepare by gathering some crucial supplies. The basic list includes white cotton items like T-shirts or pillowcases, fabric dye in colors of your choice, rubber bands, and squeeze bottles for the dye application. Don’t forget rubber gloves to protect your hands and a plastic tablecloth or garbage bag to shield your work surface from stains. Once you have all your materials, it’s important to pre-wash your fabric items to remove any finishes that may inhibit dye absorption. After they’re washed and still damp, you can start folding or twisting them into the design you want. Use rubber bands to secure these folds or twists, ensuring they’re tight enough to hold but not so tight that they prevent the dye from soaking in.
Mastering the Art of Dye Application
The real fun begins when it’s time to apply your chosen colors. There are numerous techniques to explore, each offering its own unique pattern. For a classic spiral look, twist your fabric into a disk and apply different colors in wedge-like sections. If you prefer a bullseye pattern, place a series of rubber bands along your fabric and dye each section a different color. For stripes, fold your fabric accordion-style and apply colors along the edges. After you’ve applied the dye, wrap your creation in plastic wrap and let it sit for at least 6-8 hours, or overnight, to allow the dye to set. Once the wait is over, rinse your item under cold water until it runs clear, and then wash it separately to remove any excess dye.